


Trying to set up your new club registration for this year, or planning to use Payable again for your next event? It’s easy to do, since copying a Google Form just takes a single click. But make sure you’re checking your settings and doing the extra step of configuring the Payable Add-On for your new Form in order to avoid checkout errors!
Step 1 – Copy your existing Google Form
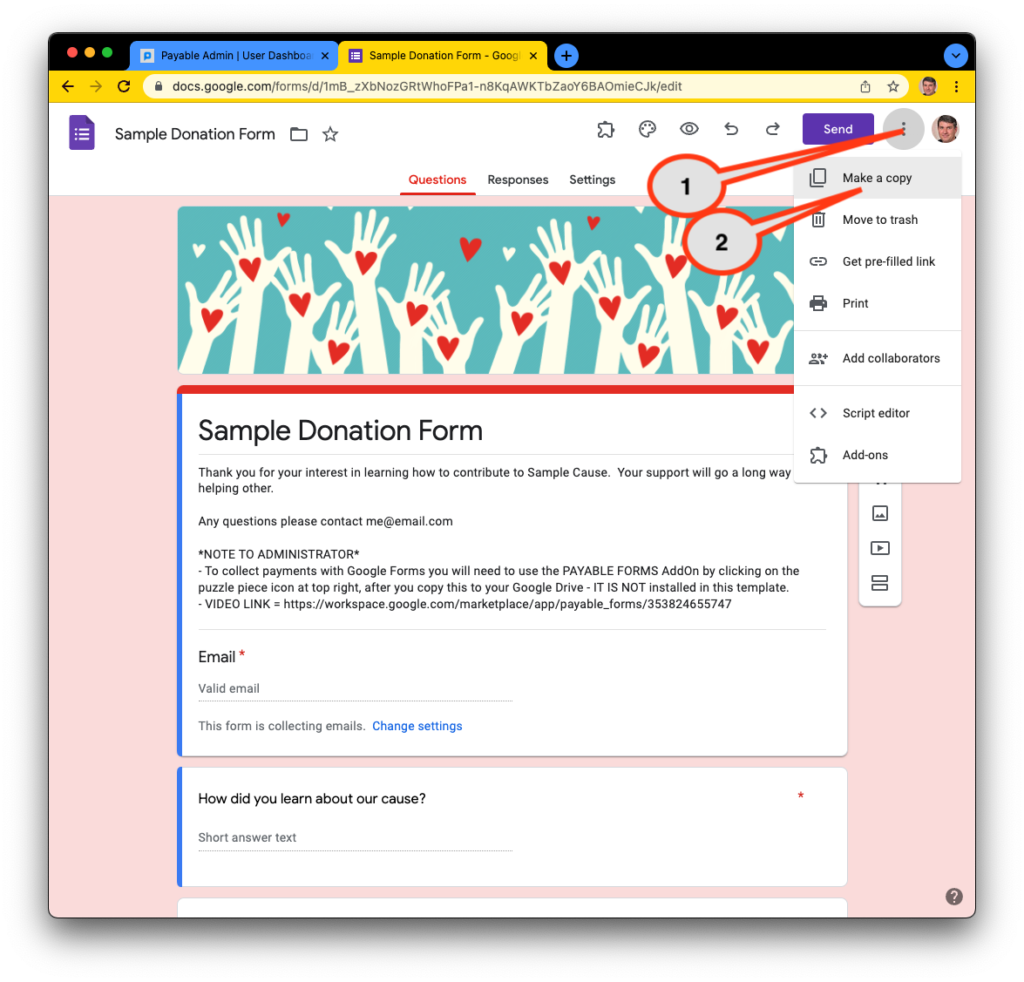
Copying an existing Google Form is very easy: Simply go to your Google Form and make a copy of it by clicking on the three dots in the upper right corner and choosing Make a copy:
Step 2 – Give your new Form a New Name
The name on your copied Form will be ‘Copy – My Old Form Name’ so make sure you change it to the updated year/date/event ASAP to avoid confusion.
Step 3 – In your new Form, make it Payable!
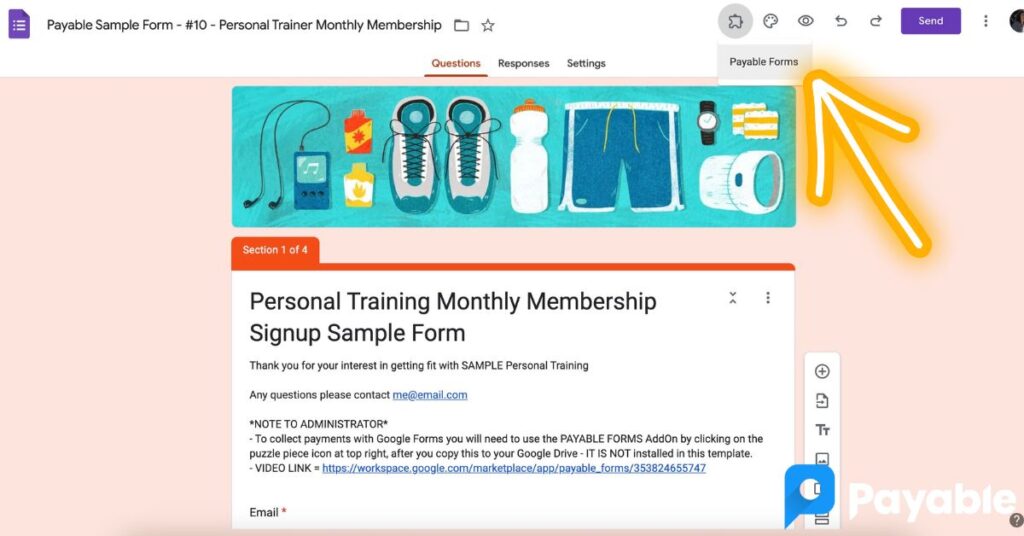
In the upper right, hit the puzzle piece and click on Payable Forms to activate the Payable Add-On. (Don’t see it? You may need to reinstall it in the Google Marketplace.)
Step 4- Configure up your Payable settings
You’ve done this before, so it should only take a few seconds! This step ensures that your Checkout is properly configured (and allows you to make sure things like tax or shipping costs haven’t changed for this year!).

Step 5- Start selling!
It’s time to get your Form out there.