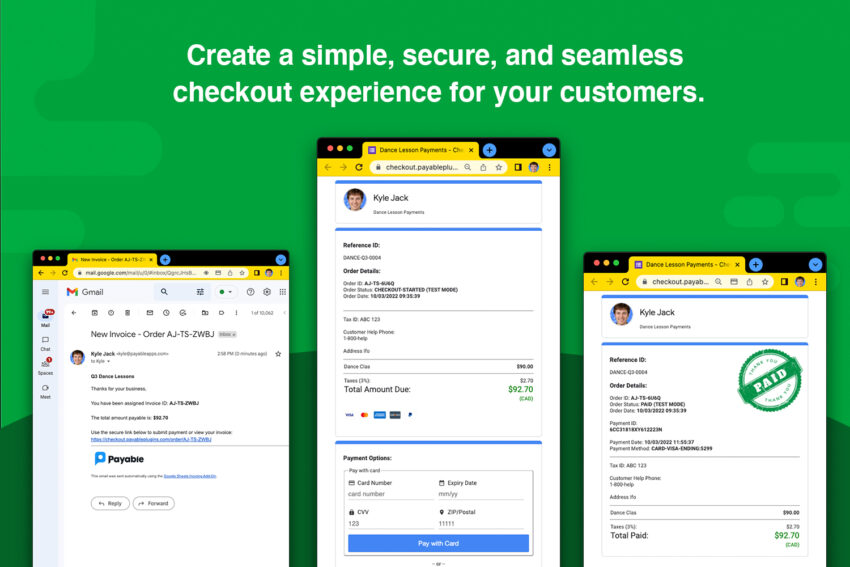
Need to do bulk invoicing, or create and send simple invoices to multiple customers with just a few clicks of a button? Payable now has an add-on for Google Sheets that allows sellers to create and send invoices, and to track their payment status right inside of Google Sheets.
Since many sellers and small businesses keep track of who owes the money in a spreadsheet already, the Payable add-on can simplify your process and save you hours. Instead of having to go to a different portal to create and send invoices, you can do it right from inside your Google Sheets—and get paid.
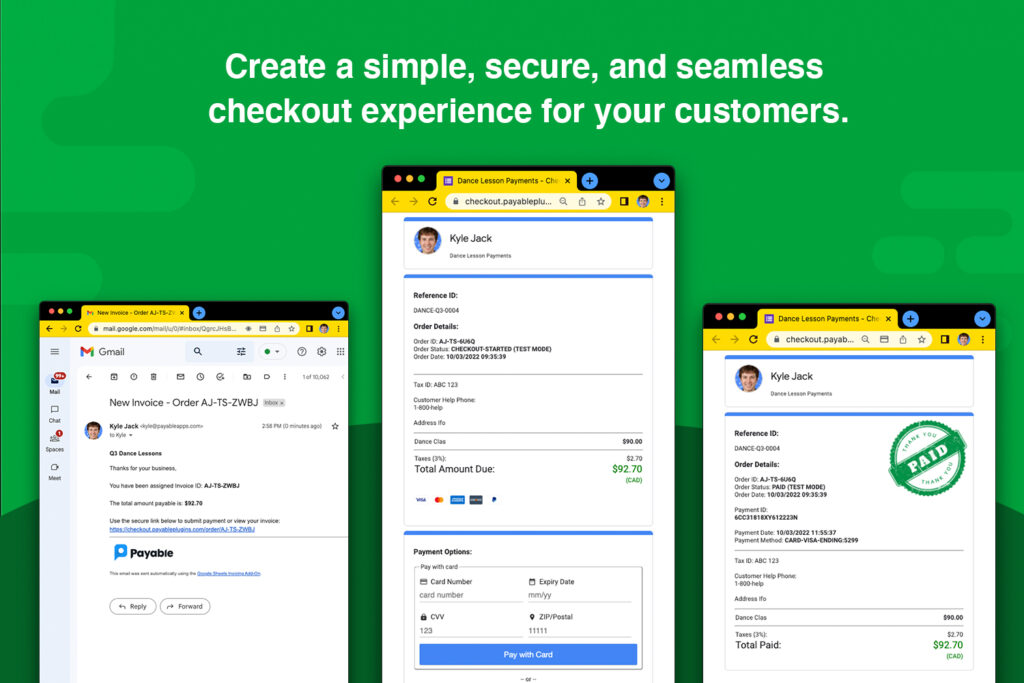
Here’s how to get started using the Payable add-on with Google Sheets to create invoices, send them automatically and get paid easily:
If you haven’t installed the Add On, go to the Google Workspace Marketplace and search for Payable Sheets. Install that add-on and you’re ready to get started!
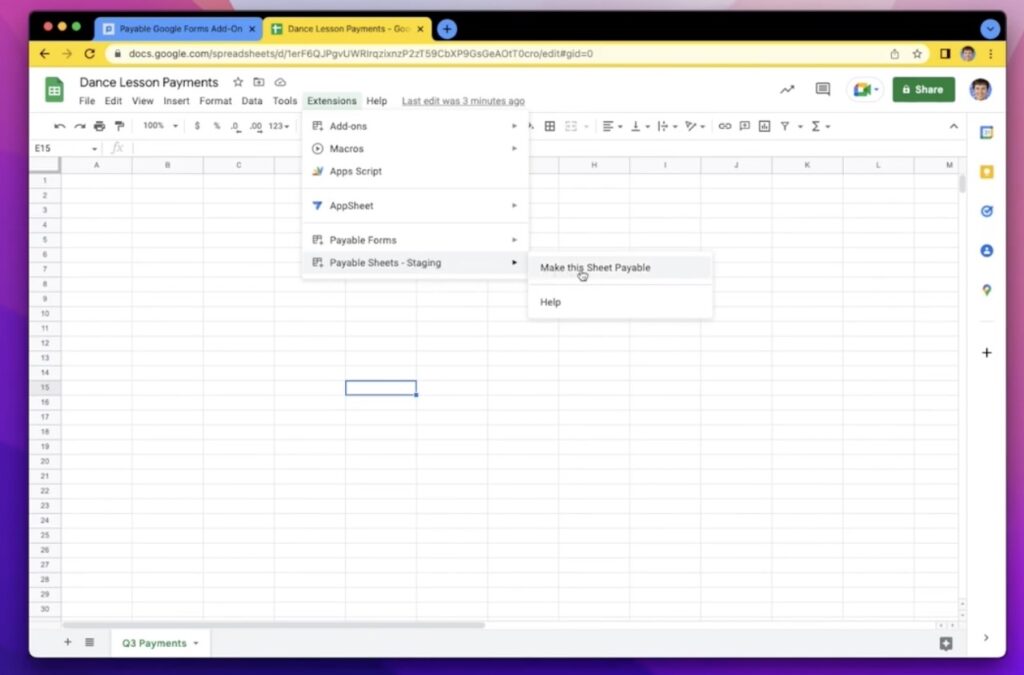
Create a new empty Sheet. Then, go to the Extensions menu and there, you’ll see a new option called Payable Sheets. Click ‘Make this Sheet Payable.’ This is going to allow you to set up your payment settings, including your country and currency.
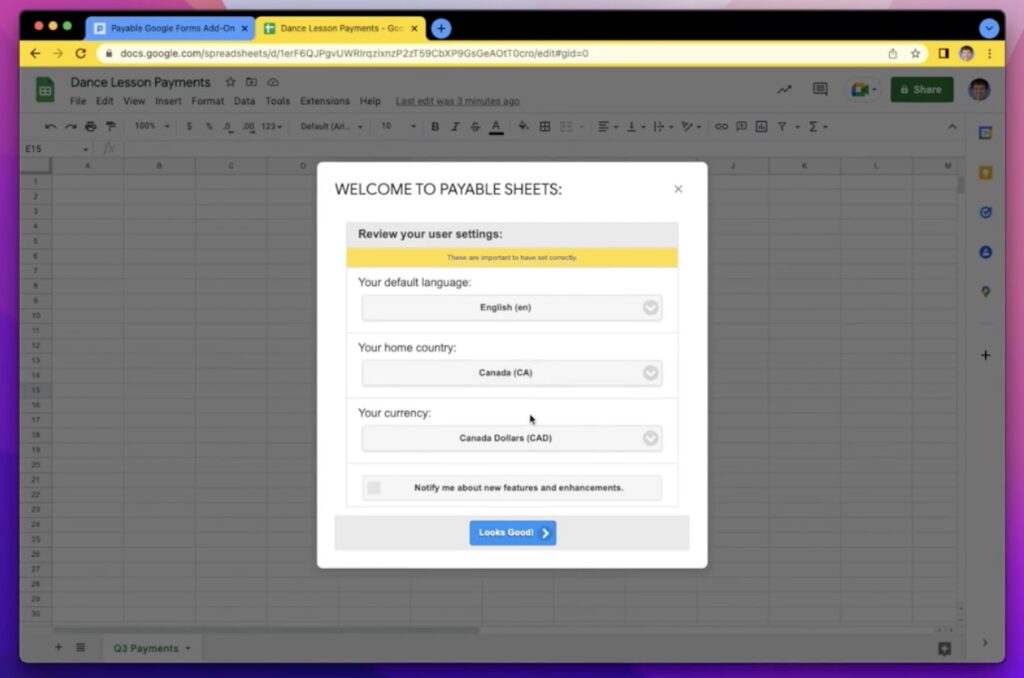
After installation, you now have some new functions that you can use inside of your spreadsheet, and you’ll see them here. Then, you’ll be taken through a quick Getting Started video to help you see how the Sheet works—once you get the hang of it, you’ll be able to send invoices in seconds!
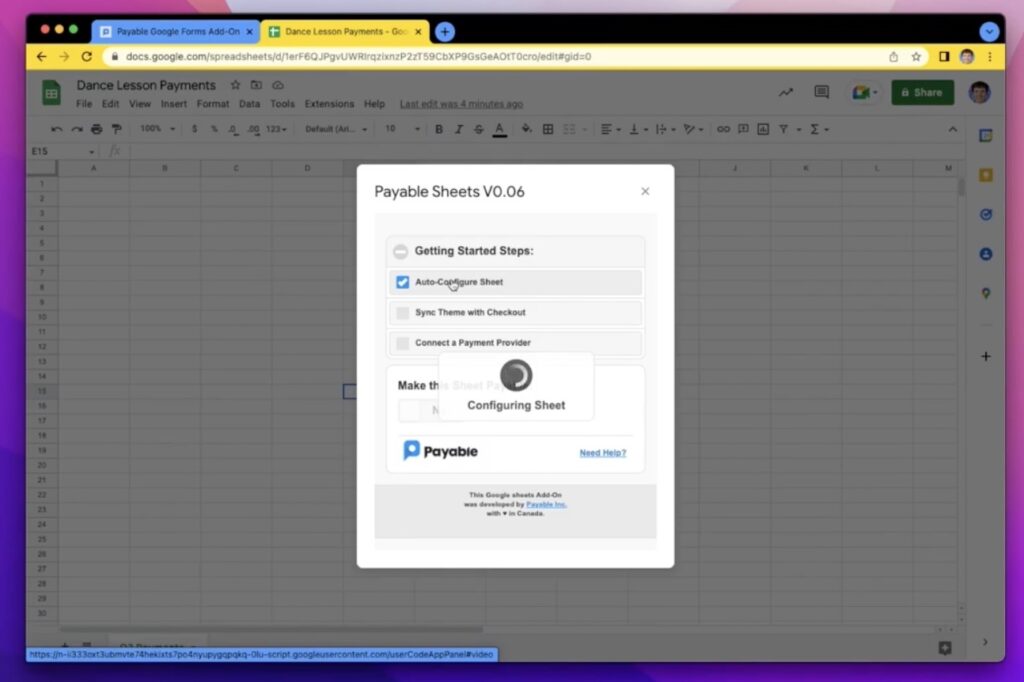
After that, a Setup window will open. First, click ‘Auto Configure Sheet,’ which pre-populates some columns that you can use for your customers as well as ones that Payable will use to track the actual payment status.
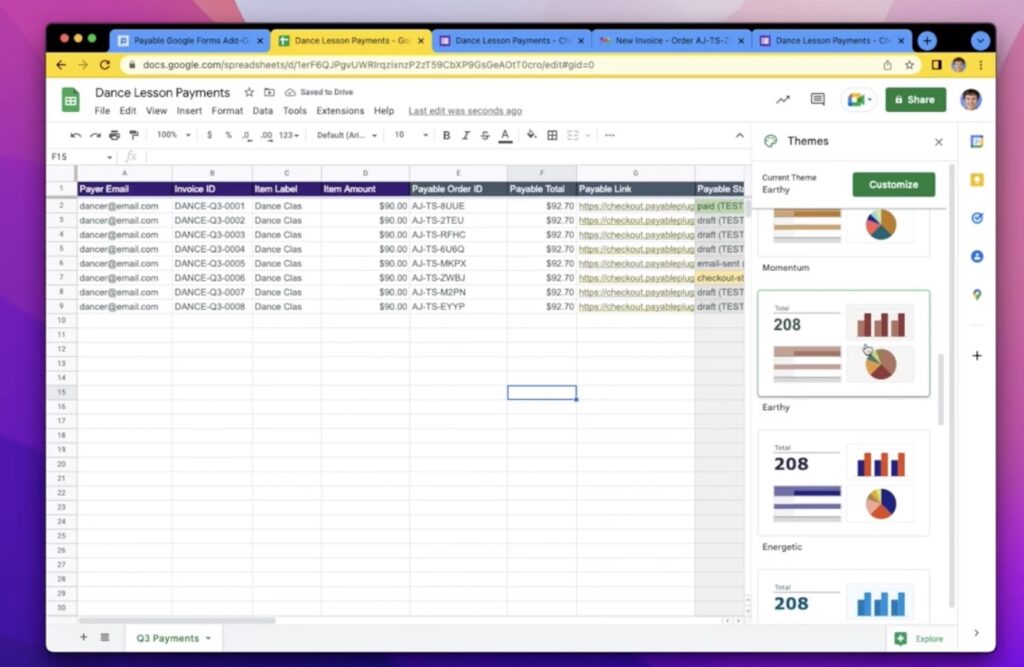
You can also sync your theme. This lets you change the style and colors that will be on the checkout page, and these will come directly from what you use in the sheet. (It will continue to sync as you make changes to fonts and colors later!)
This is where you can customize your customer experience: Since the checkout page Payable creates syncs to your Sheet, you can play with colors in your background, font styles and color, and accent colors—those styles will impact your checkout page, so to see what’s changed, just click a Payable links once you’ve created your first test invoice!
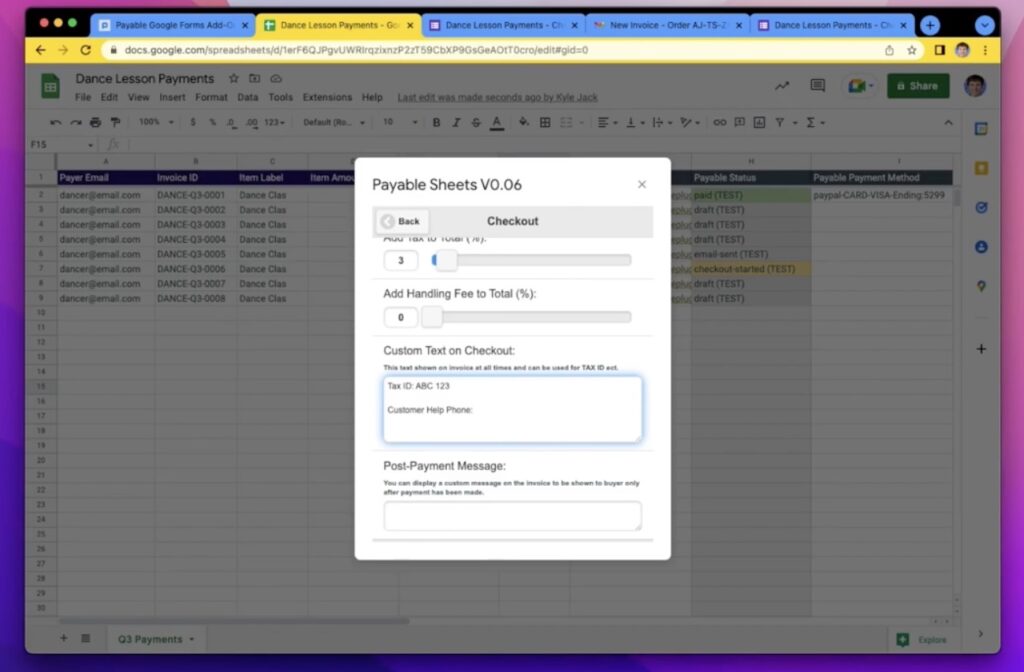
You can also continue to customize the text that customers see on your checkout page by going to the Extensions menu and clicking on Setups – Configure Payment Settings – Checkout Settings.
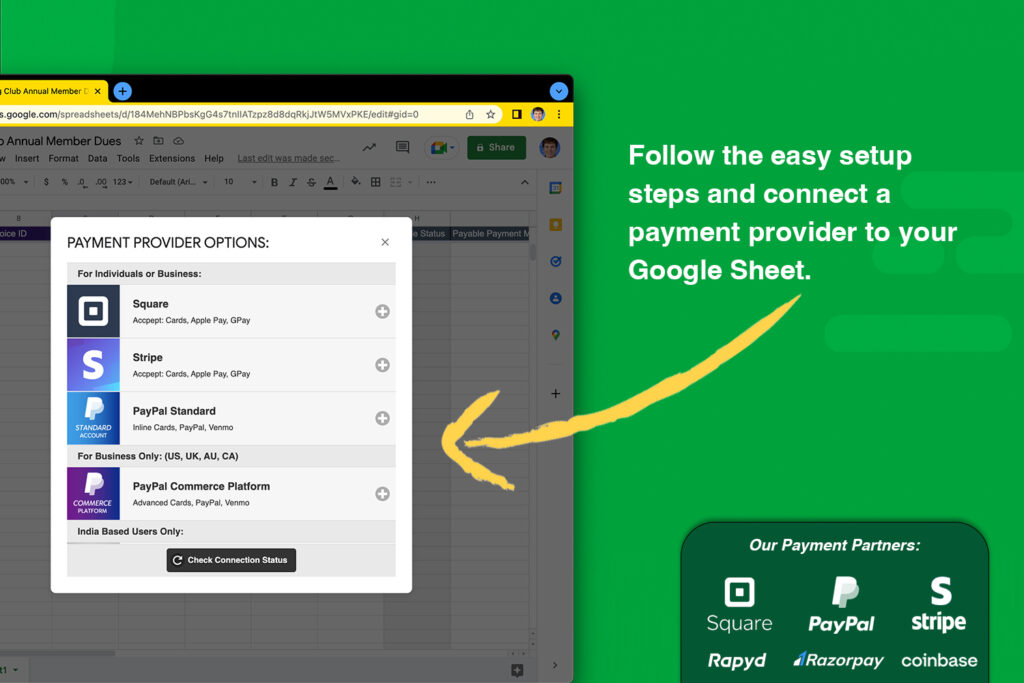
Last, it’s time to connect a payment provider, Paypal (Stripe, Square and more payment options are coming soon!). You’ll need to log into your payment provider and you’ll have to agree to let Payable connect with your payment provider.
Once that’s done, you’ll be returned to the Setup window, and you’ll see that all three boxes are checked. That means you’re ready to start creating invoices!
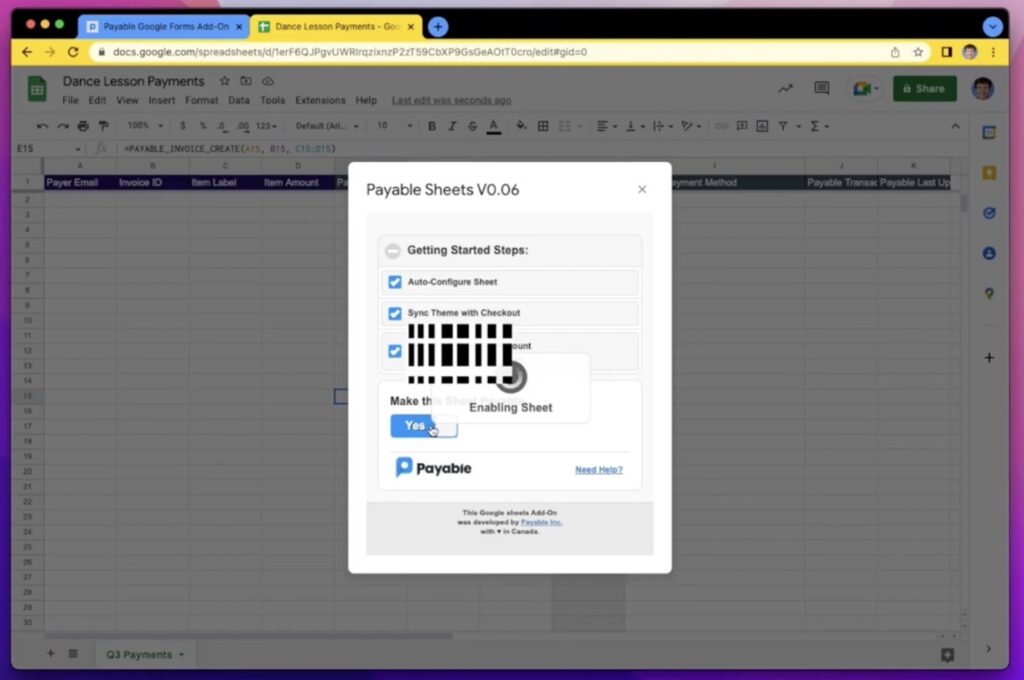
Toggle the green button to make your Sheet Payable. Once that’s done, every time the Sheet is open, Payable can check for payment updates.
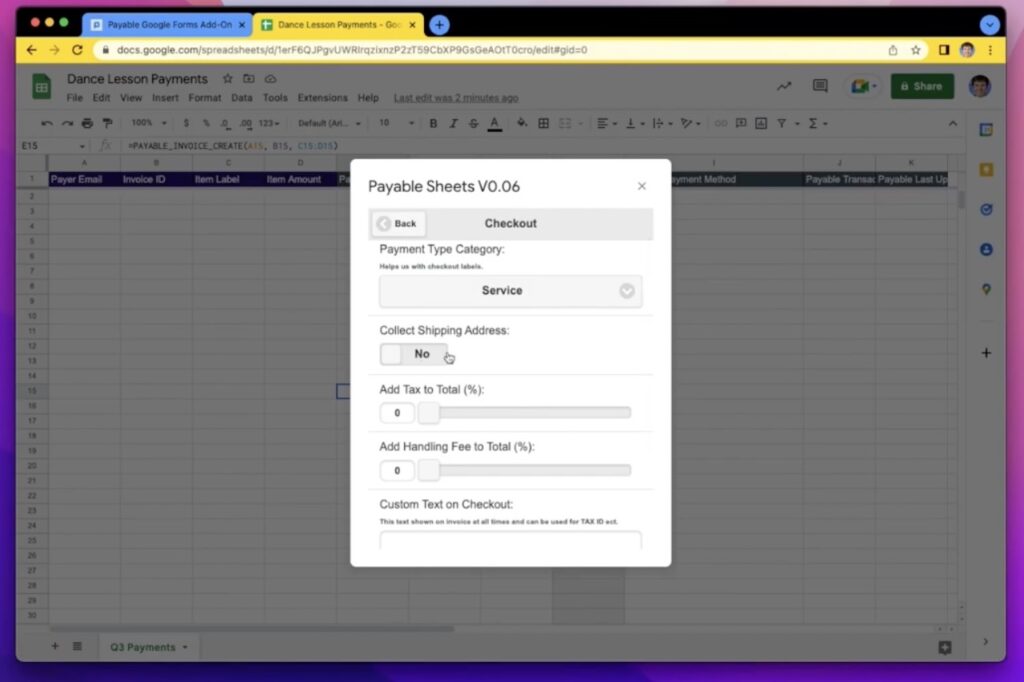
Now, we go to the Payment Settings Menu, accessible in Extensions. Leave your Sheet in Test Mode as you get set up, but make sure you turn that off when you’re ready to accept payments. In the Payment Settings, you’ll see your currency and your payment provider. And in the Checkout Settings, you’ll see some options collecting a shipping address or adding tax or handling fees to your total. You can also include information in your checkout like your Tax ID number if you’re a business.
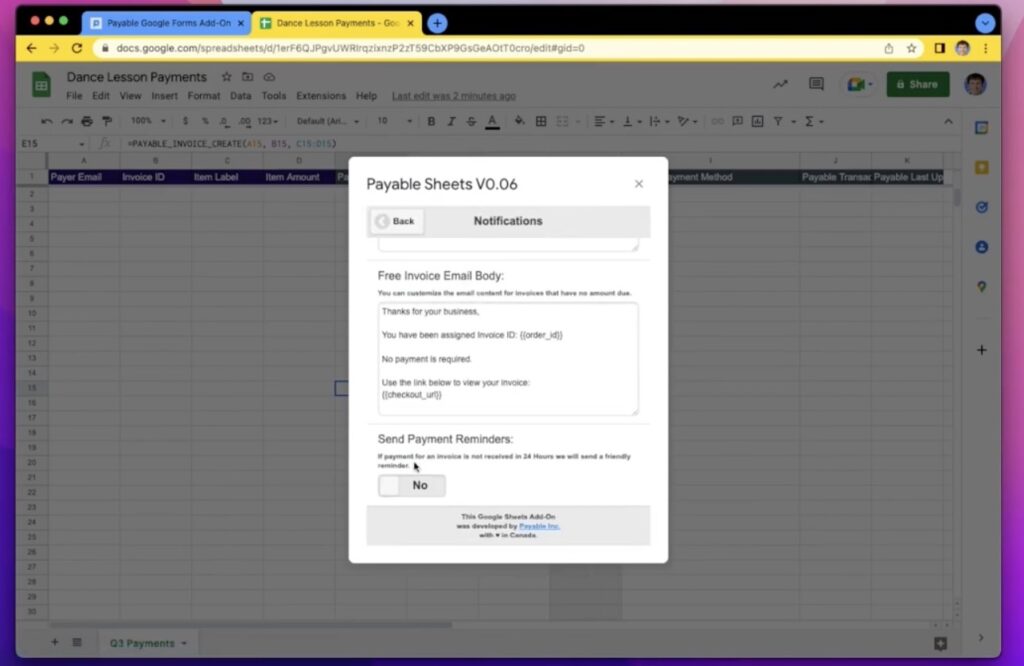
This area also allows you to change Notifications, including how you send payment reminders, and create promos if you want to. (Note: In the Notifications settings, don’t change anything inside of the {{ }} , though you can change text around them.)
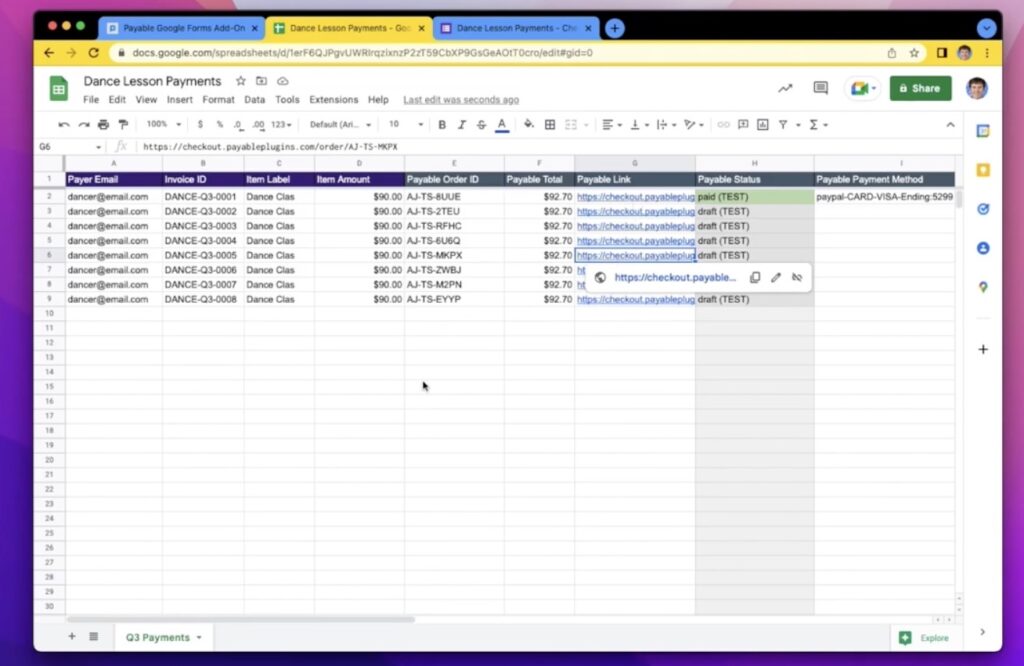
Now, when you go back to your Sheet, you’ll see that there are new columns that have been created. The Payable Invoice Create will take the information you enter in the first four columns—the payer email address, an invoice ID that you create, the item you listed, and the cost of the item—and it will automatically create an invoice for you. The invoice details and a new Payable ID for each invoice will automatically populate into your Sheet when Payable is activated.
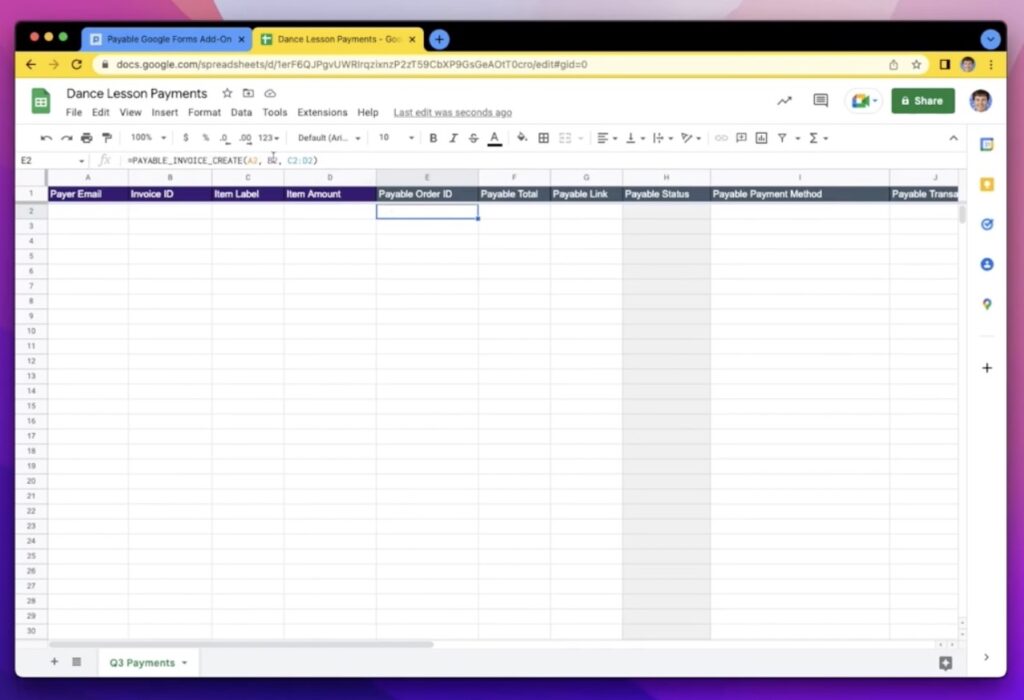
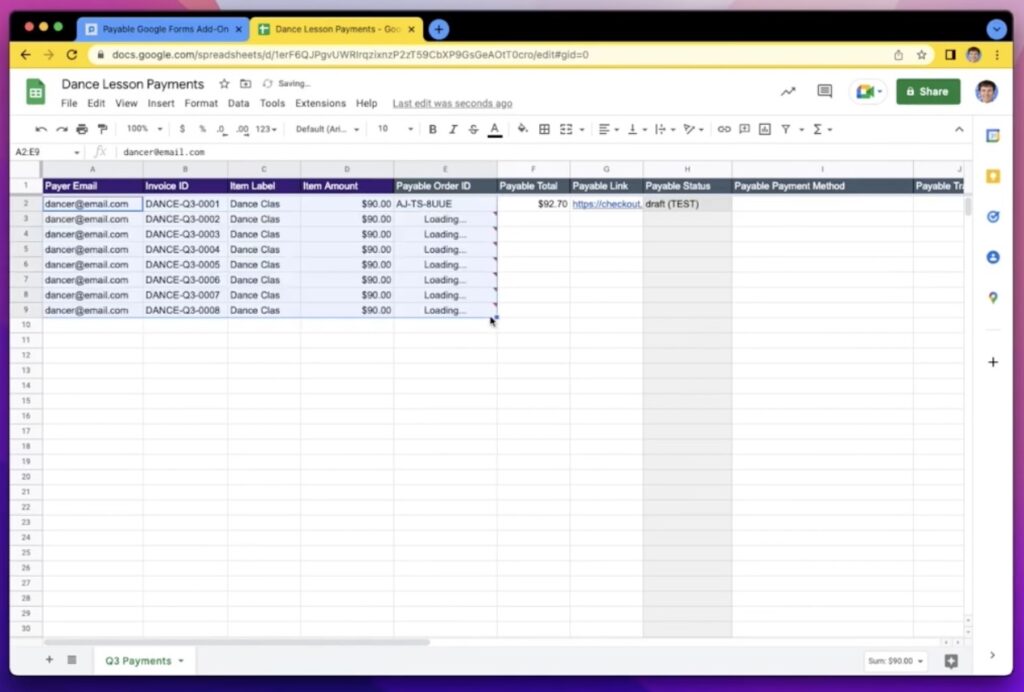
We suggest making a test invoice. To create your first invoice, start with the client email (use yours to test the process), an invoice ID (ideally a combination of a word and number starting with 1), the item purchased, and the total $$ due. This will then auto-populate the Payable columns (but won’t send your invoice yet!). You’ll see a Payable Order ID and the Payable total (which reflects any handling fees or tax that you set up in your Checkout Settings). You’ll also see a Payable Link, which has a link to the checkout page if you need it (though that checkout page will also be emailed to your customer when you’re ready!). You’ll also see columns that will populate as your invoice is submitted, viewed and paid.
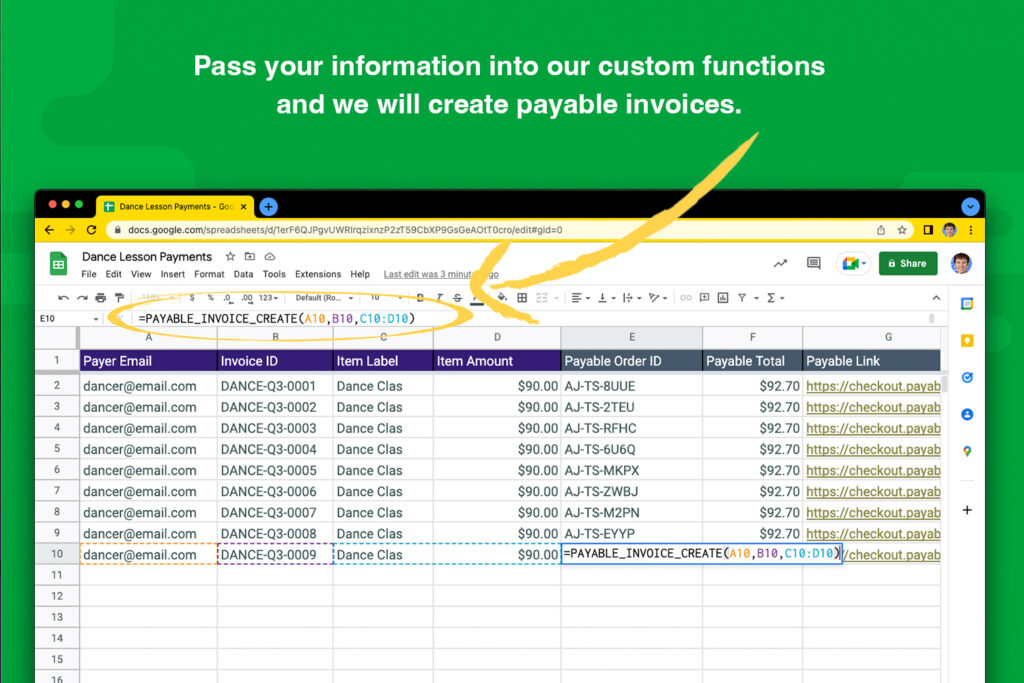
If you want to bulk invoice, you can simply highlight the first five columns and drag them down to create new invoices. To create similar invoices for different email addresses, simply drag down the second through fifth columns, then add in email addresses.
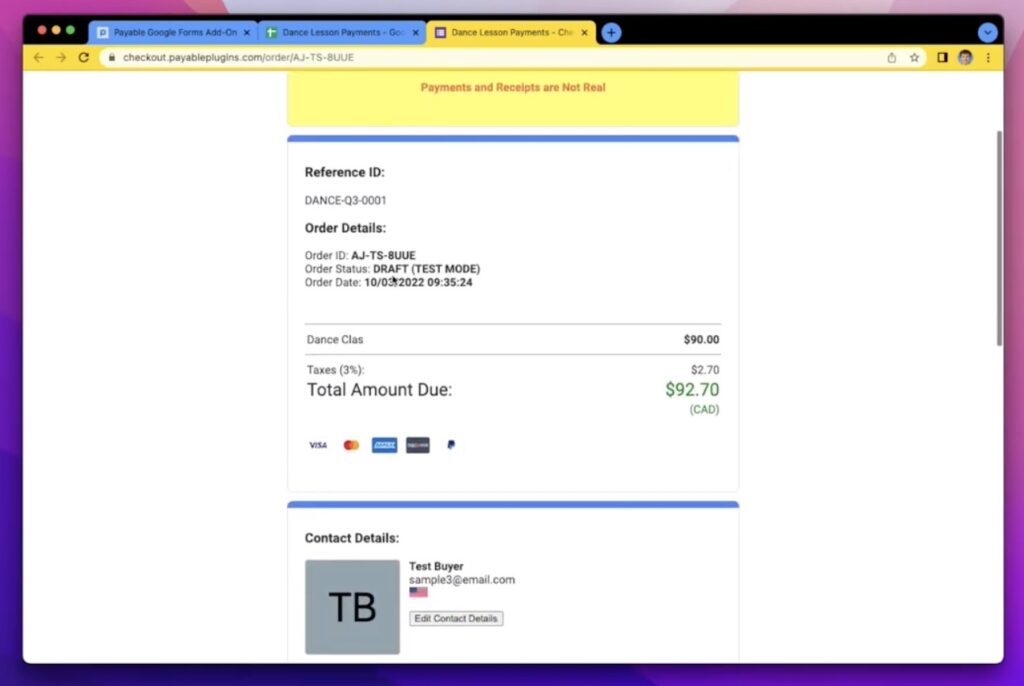
To see what the Checkout page looks like, simply click on the link. Every order invoice that Payable creates has a unique checkout URL. While in Test Mode, you can practice the experience of what it would look like using fake credit cards and other payment methods.
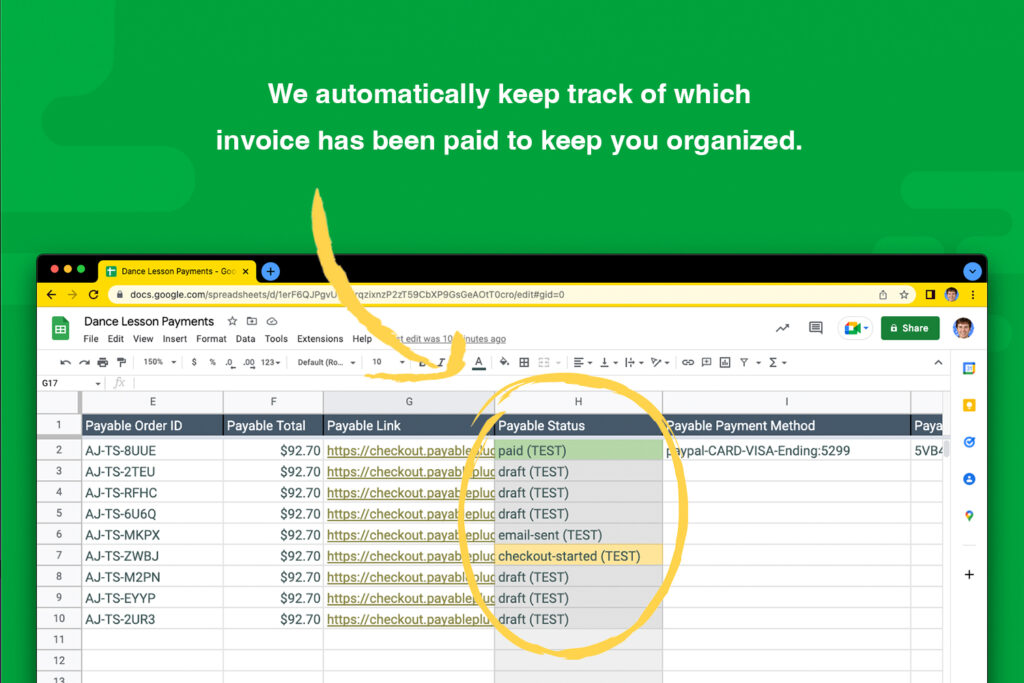
If you use the payment method to test-pay, you’ll see that change reflected in the Payable Status in the Sheet:
To send your invoices to start getting paid, first make sure you’ve turned off Test Mode so you can accept real payments. Now, you have two options: You can simply send out those individual links from Column G via email/text/any other messaging system if you prefer sharing them one at a time, or you can send them by automation.
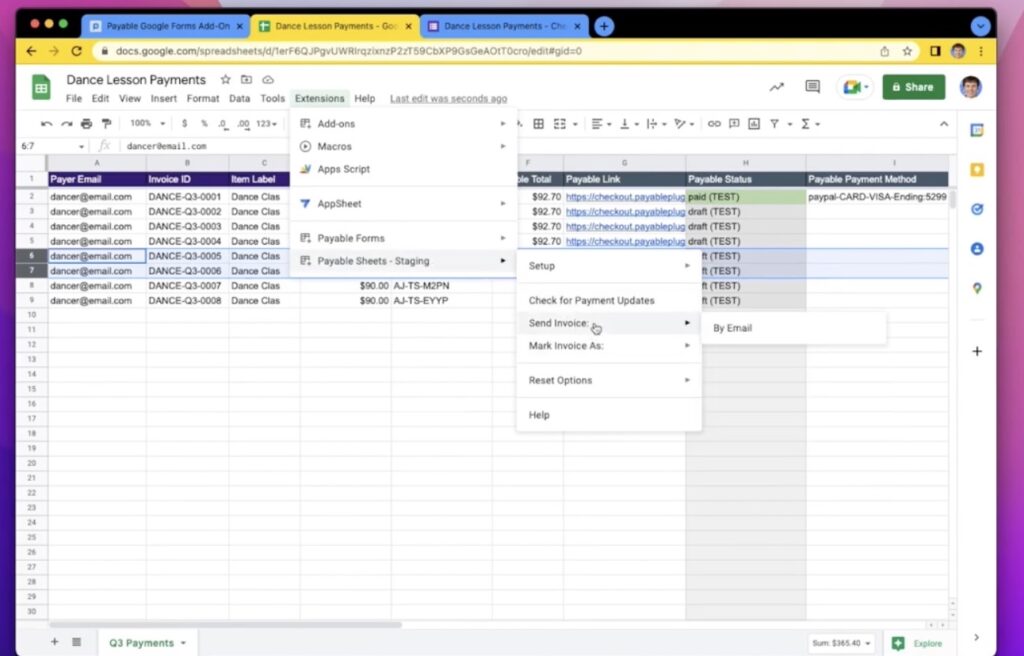
To send invoices in an automated way, select the invoice or invoices that you want to send. Go to the Extensions menu, and in the Payable section, choose your method of sending. (Note that Gmail will only allow you to send 150 emails per day like this for a personal account, or 1500 if you have a Google Workspace Account.)
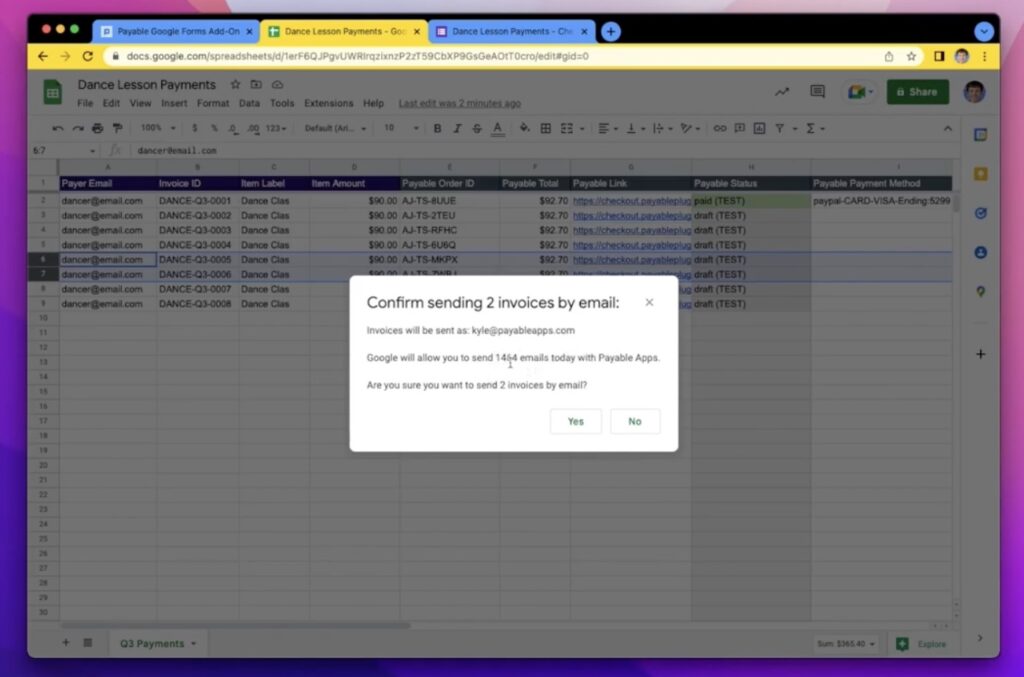
You’ll have the chance to add optional memos to the invoices going out, and then, your invoices will be sent using the template you specified in the setup! (If you send an invoice while you’re still is Test Mode, it will be sent to your Gmail—so you can do this if you want to check what the email will look like.)
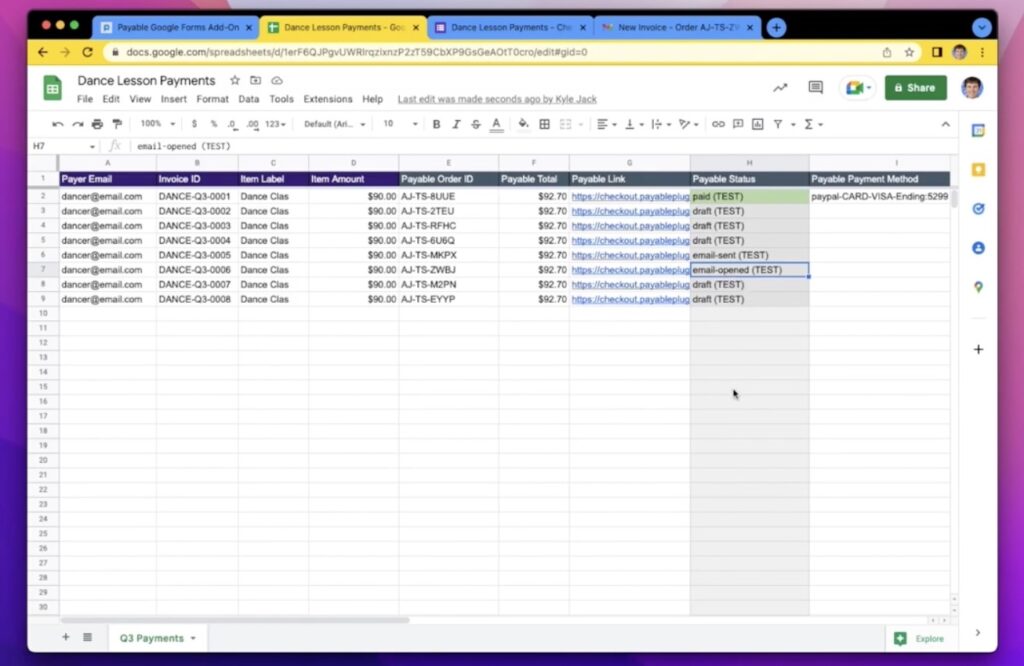
Back in your Sheet, you’ll be able to see when the email is opened, when the Checkout page is opened, when Checkout is started and when it’s paid. Once the order has been paid for, the Checkout link becomes a copy of the receipt, if you ever need to access it. You’ll also see that there’s a column with the Payable Transaction ID, so that you can see the PayPal or payment provider transaction in case you later need to refund or reconcile it.
Watch the process in more depth here:
