


If you’re making a Google Form, you can leave it with all of the normal setting. But if you’re hoping to get sign ups, purchases, or even just get people excited to fill out your Form, spend some time making your Form look and feel more customized. You can make a completely unique form in minutes!
Change Up the Color Scheme
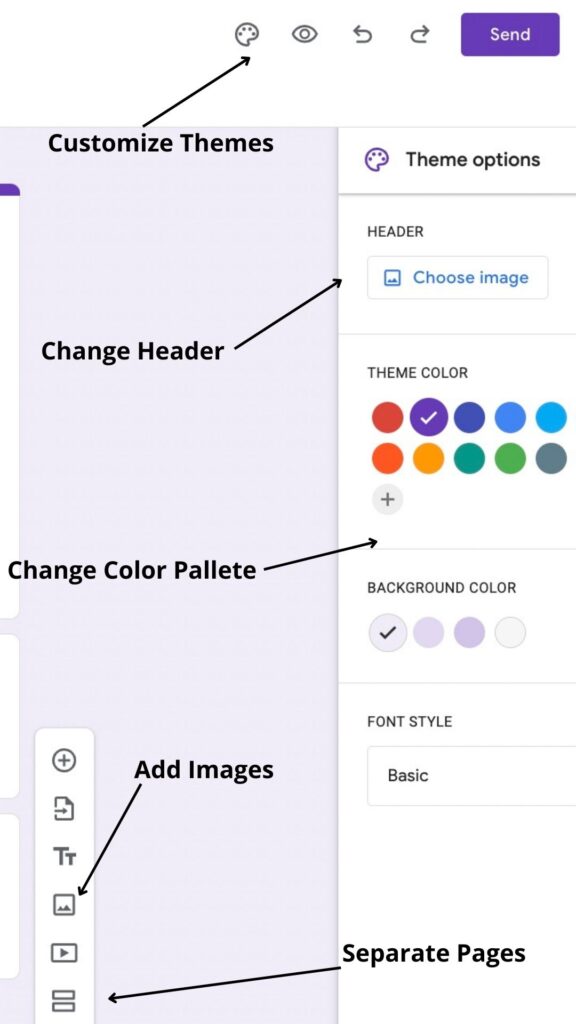
Google Forms will default to the generic purple color scheme when you create a new form, but make your Form stand out by changing up the color scheme to match your logo. This small change can make a big difference, especially if you are using Google Forms in a more professional capacity and trying to make it feel more like an extension of your website or brand.
Use Canva.com to Create a Header Image
You can change the header image and utilize Google’s stock images, or you can make your own and actually add text and logos to a more personalized image that will sit at the top of your form. Using the ultra-simple free graphic design site Canva.com, you can create an image that’s 1600×400 pixels. Add text, logos, images—whatever you want!
Add More Images Throughout
In Google Forms, you can add images throughout your Form, and this is a great way to break up longer sections of questions and create a more robust page, especially if you’re putting together a registration for something like a summer camp that requires a lot of fields to be filled out. In the same way you’d add a question, just click on the button to add an image. You can use your own images, or opt for royalty-free images from a site like UnSplash.
Google Forms doesn’t allow you to add different Header sections in a Form, but inserting an image creates a workaround for this. You can create images in Canva that contain header text/content if you want to break up your Form with different “section headers.”
Create Separation within the Form
For long applications, consider splitting your Form into multiple pages. In the same way you’d add a question, add a Section (the bottom option with two lines). This makes it easier for people to flow through your Form and answer all the questions smoothly. Be careful with this, though, because it can make it trickier for people to easily start filling out the Form and return later to finish it.
Add Links
Did you know that Google Forms now lets you add links to your questions and in description text? This can make your Form look cleaner while making sure clients can access all the info that they need!
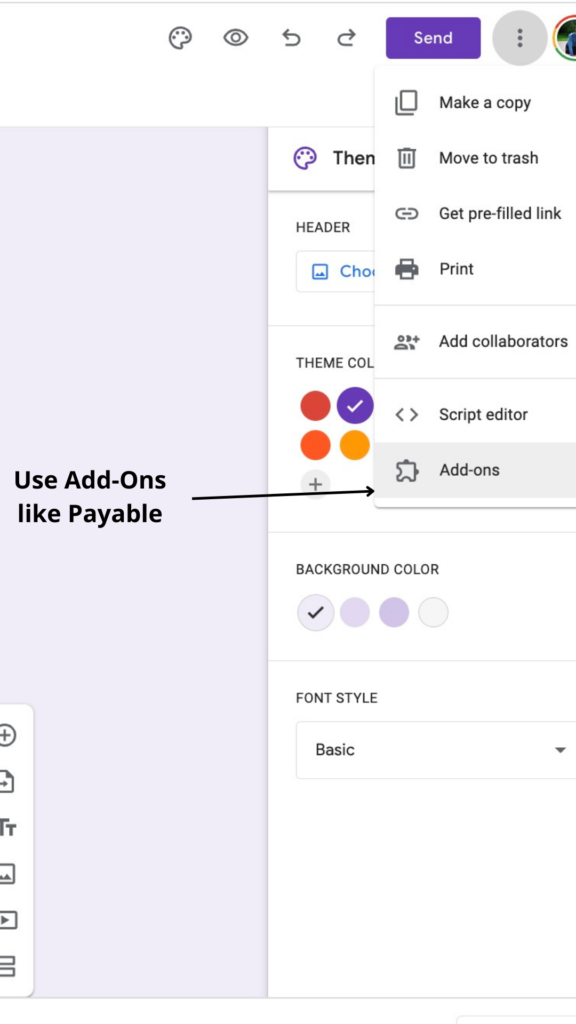
Use the Payable Add-On to Take Payments
Add-Ons are often overlooked in Google Forms, but did you know that you can actually use a Google Form to accept payments? This instantly speeds up things like applications, registrations, and fundraisers. Use the Payable Forms Add-On and in minutes, you’ll be able to accept Square, Paypal, Stripe or Razorpay as payments.
Let us know in the comments: What are your favorite easy/free ways to customize a Google Form?